
General Notes
This is an expert-level kit, which may require some trimming and fitting of pieces. You are building a fine scale model of a ship, but ships are rarely rectilinear, which means you may be learning a few new skills, such as bending styrene. The fitting and trimming result from tiny errors in alignment, which are magnified just because things are not necessarily square and plumb–this is part of shipbuilding, and should not worry you unduly, as a few swipes of a file or sanding stick will correct errors.
This hull is constructed as a see-through model, so the hull construction is a little more complicated. If you want to detail the interior, I recommend you do it as the decks are constructed.
Inspect all pieces for the cleanliness of the cut. It is recommended to swipe all edges lightly with a sanding stick to remove any flash.
Port Welcome Instructions (PDF)
Click on images for a larger view.
Building The Hull
If necessary, poke out the chads from the window openings on the hull sides. If they are difficult to dislodge, place the side, shiny side up, on a paper towel folded a few times (or other soft surface) and press gently at a corner with the back edge of a knife blade (or the tip of a tweezers) until it gives. If this doesn’t begin to dislodge the chad, try it with the shiny side down.
Put the sides aside, but save the chads, as they will be used for reinforcements.
Laminate the two pieces of hull bottom, making sure they are correctly aligned.
There are three keels. Glue one to the centerline of the hull bottoms, making sure the point of the hull bottoms is aligned with the bottom of the keel. The rear of the keel should align with the rear of the hull bottoms.

Use window chads for reinforcements.
Glue the other two keels in an arc as shown. Their fronts should be slightly behind the center keel. The arc is not critical. Just make sure the rears do not stick out over the rear of the bottoms.
Use the chads from the windows to reinforce the joints. Spacing is not critical: just make sure they do not protrude higher than the keels, nor outside the bottoms.
Glue the main deck on to the keels, aligning the point of the main deck with the top point of the center keel. Make sure the assembly is vertical at the rear.
Laminate the two pieces of the 01 deck center keel. Glue it to the centerline of the main deck, aligning the bow so that the front of the keels form the same angle. Reinforce the 01 keel with more chads.
Glue the main deck rear bulkhead to the main deck and the 01 keel.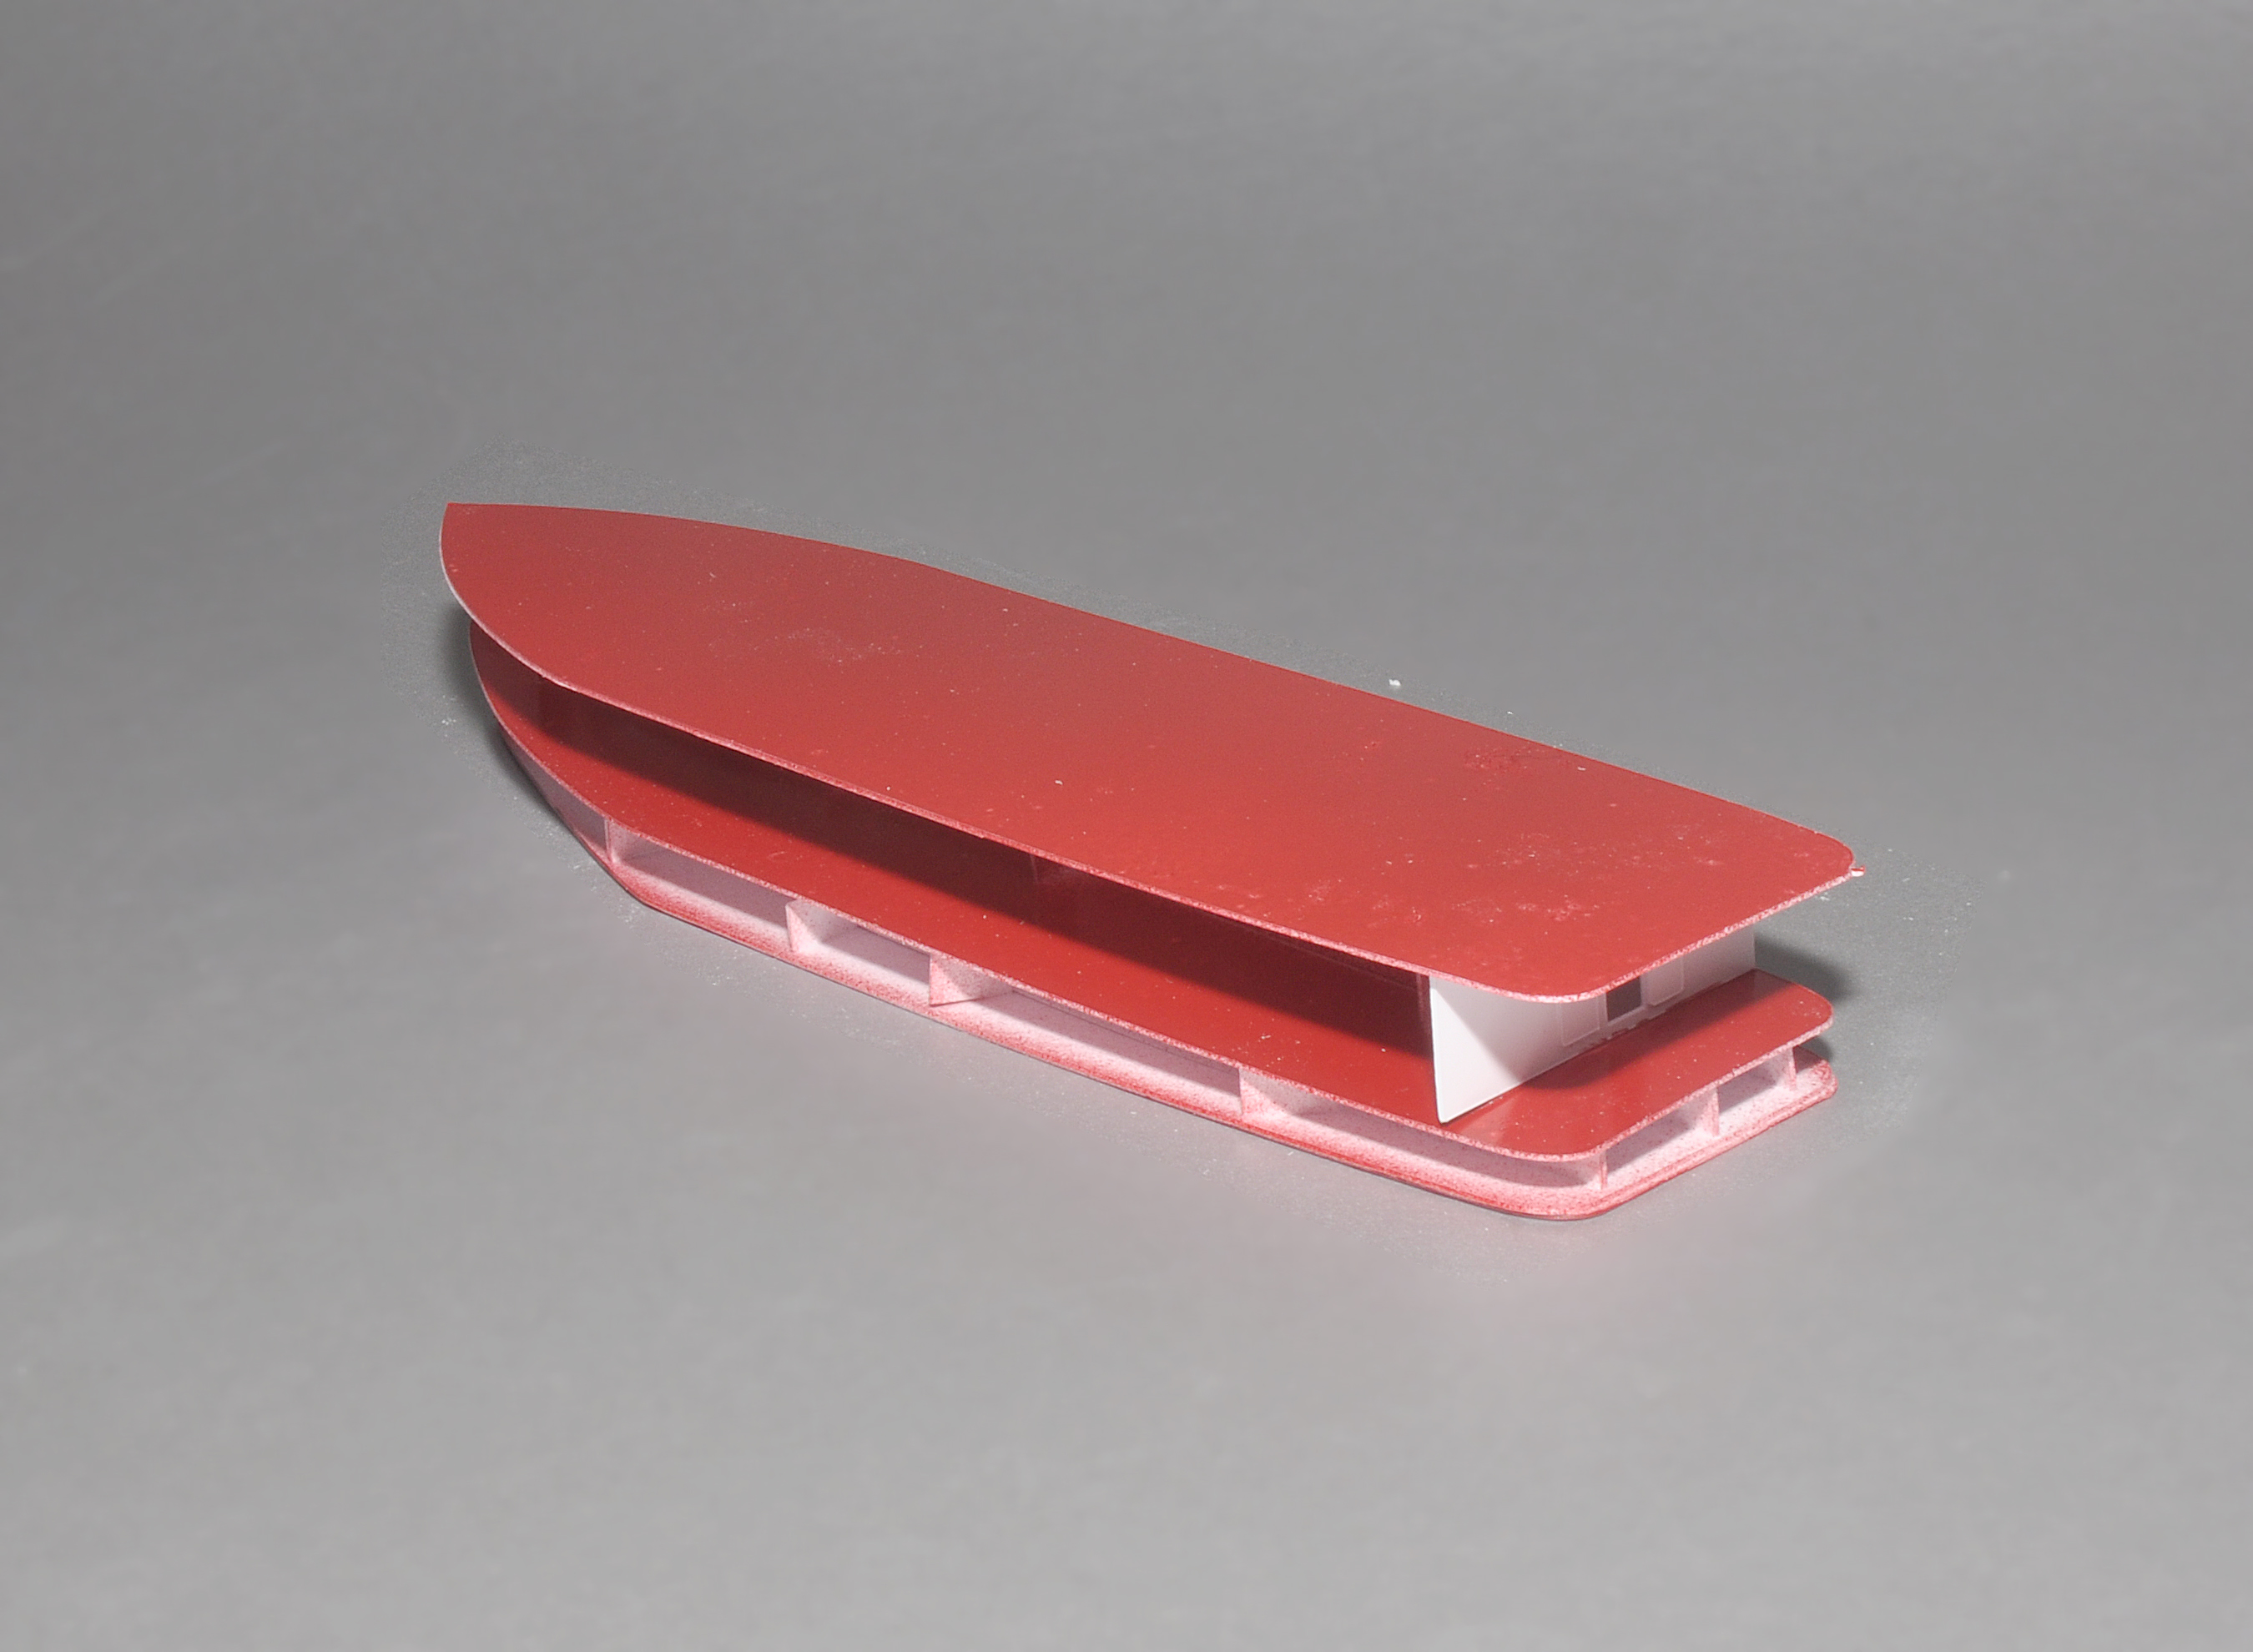
Glue the 01 deck to the 01 keel at the centerline, again aligning the point of the bow with the 01 keel. You may want to reinforce the long joint of the bottom of the deck with the 01 keel with more chads: this is optional. The joint is rather flimsy in any case; this will be corrected in the next steps.
At this point, cut two pieces of acetate to cover the main deck windows. These need to be just barely larger than the overall opening, or about 8 mm x 113 mm in N (about 6 mm x 83 mm in Z). Cut smaller pieces to cover the portholes on the main deck. All these pieces need to be fairly close to the window openings so that the thickness of the acetate does not interfere with the joining of decks to the hull sides.
Also consider if you want the bulkhead doors open or closed. This is a good time to apply acetate to the windows and doors of the bulkheads. The doors of the bulkheads may not be interchangeable, thus they are bagged individually.
Ready a number of one-inch strips of masking tape to help you align the hull sides with the bottoms.
Take one hull side (shiny side out) and align the bottom with the point of the bow. Tack glue the first 25 mm (1 inch) of the bottom of the hull side to the hull bottom, making sure that the bottom of the hull side follows the line of the hull bottom. 
Continue gluing the hull side to the hull bottom, using strips of making tape to maintain alignment. Stop before the side takes a sharp turn around the stern.
Now glue the hull side to the main deck. You may need to wrap the bow with masking tape to keep the joints tight.
Remove the tape and repeat the gluing on the other side.
Level the 01 deck between the hull sides, using the bottom line of the windows as a guide. When level, glue small lengths of the 01 deck to the hull sides.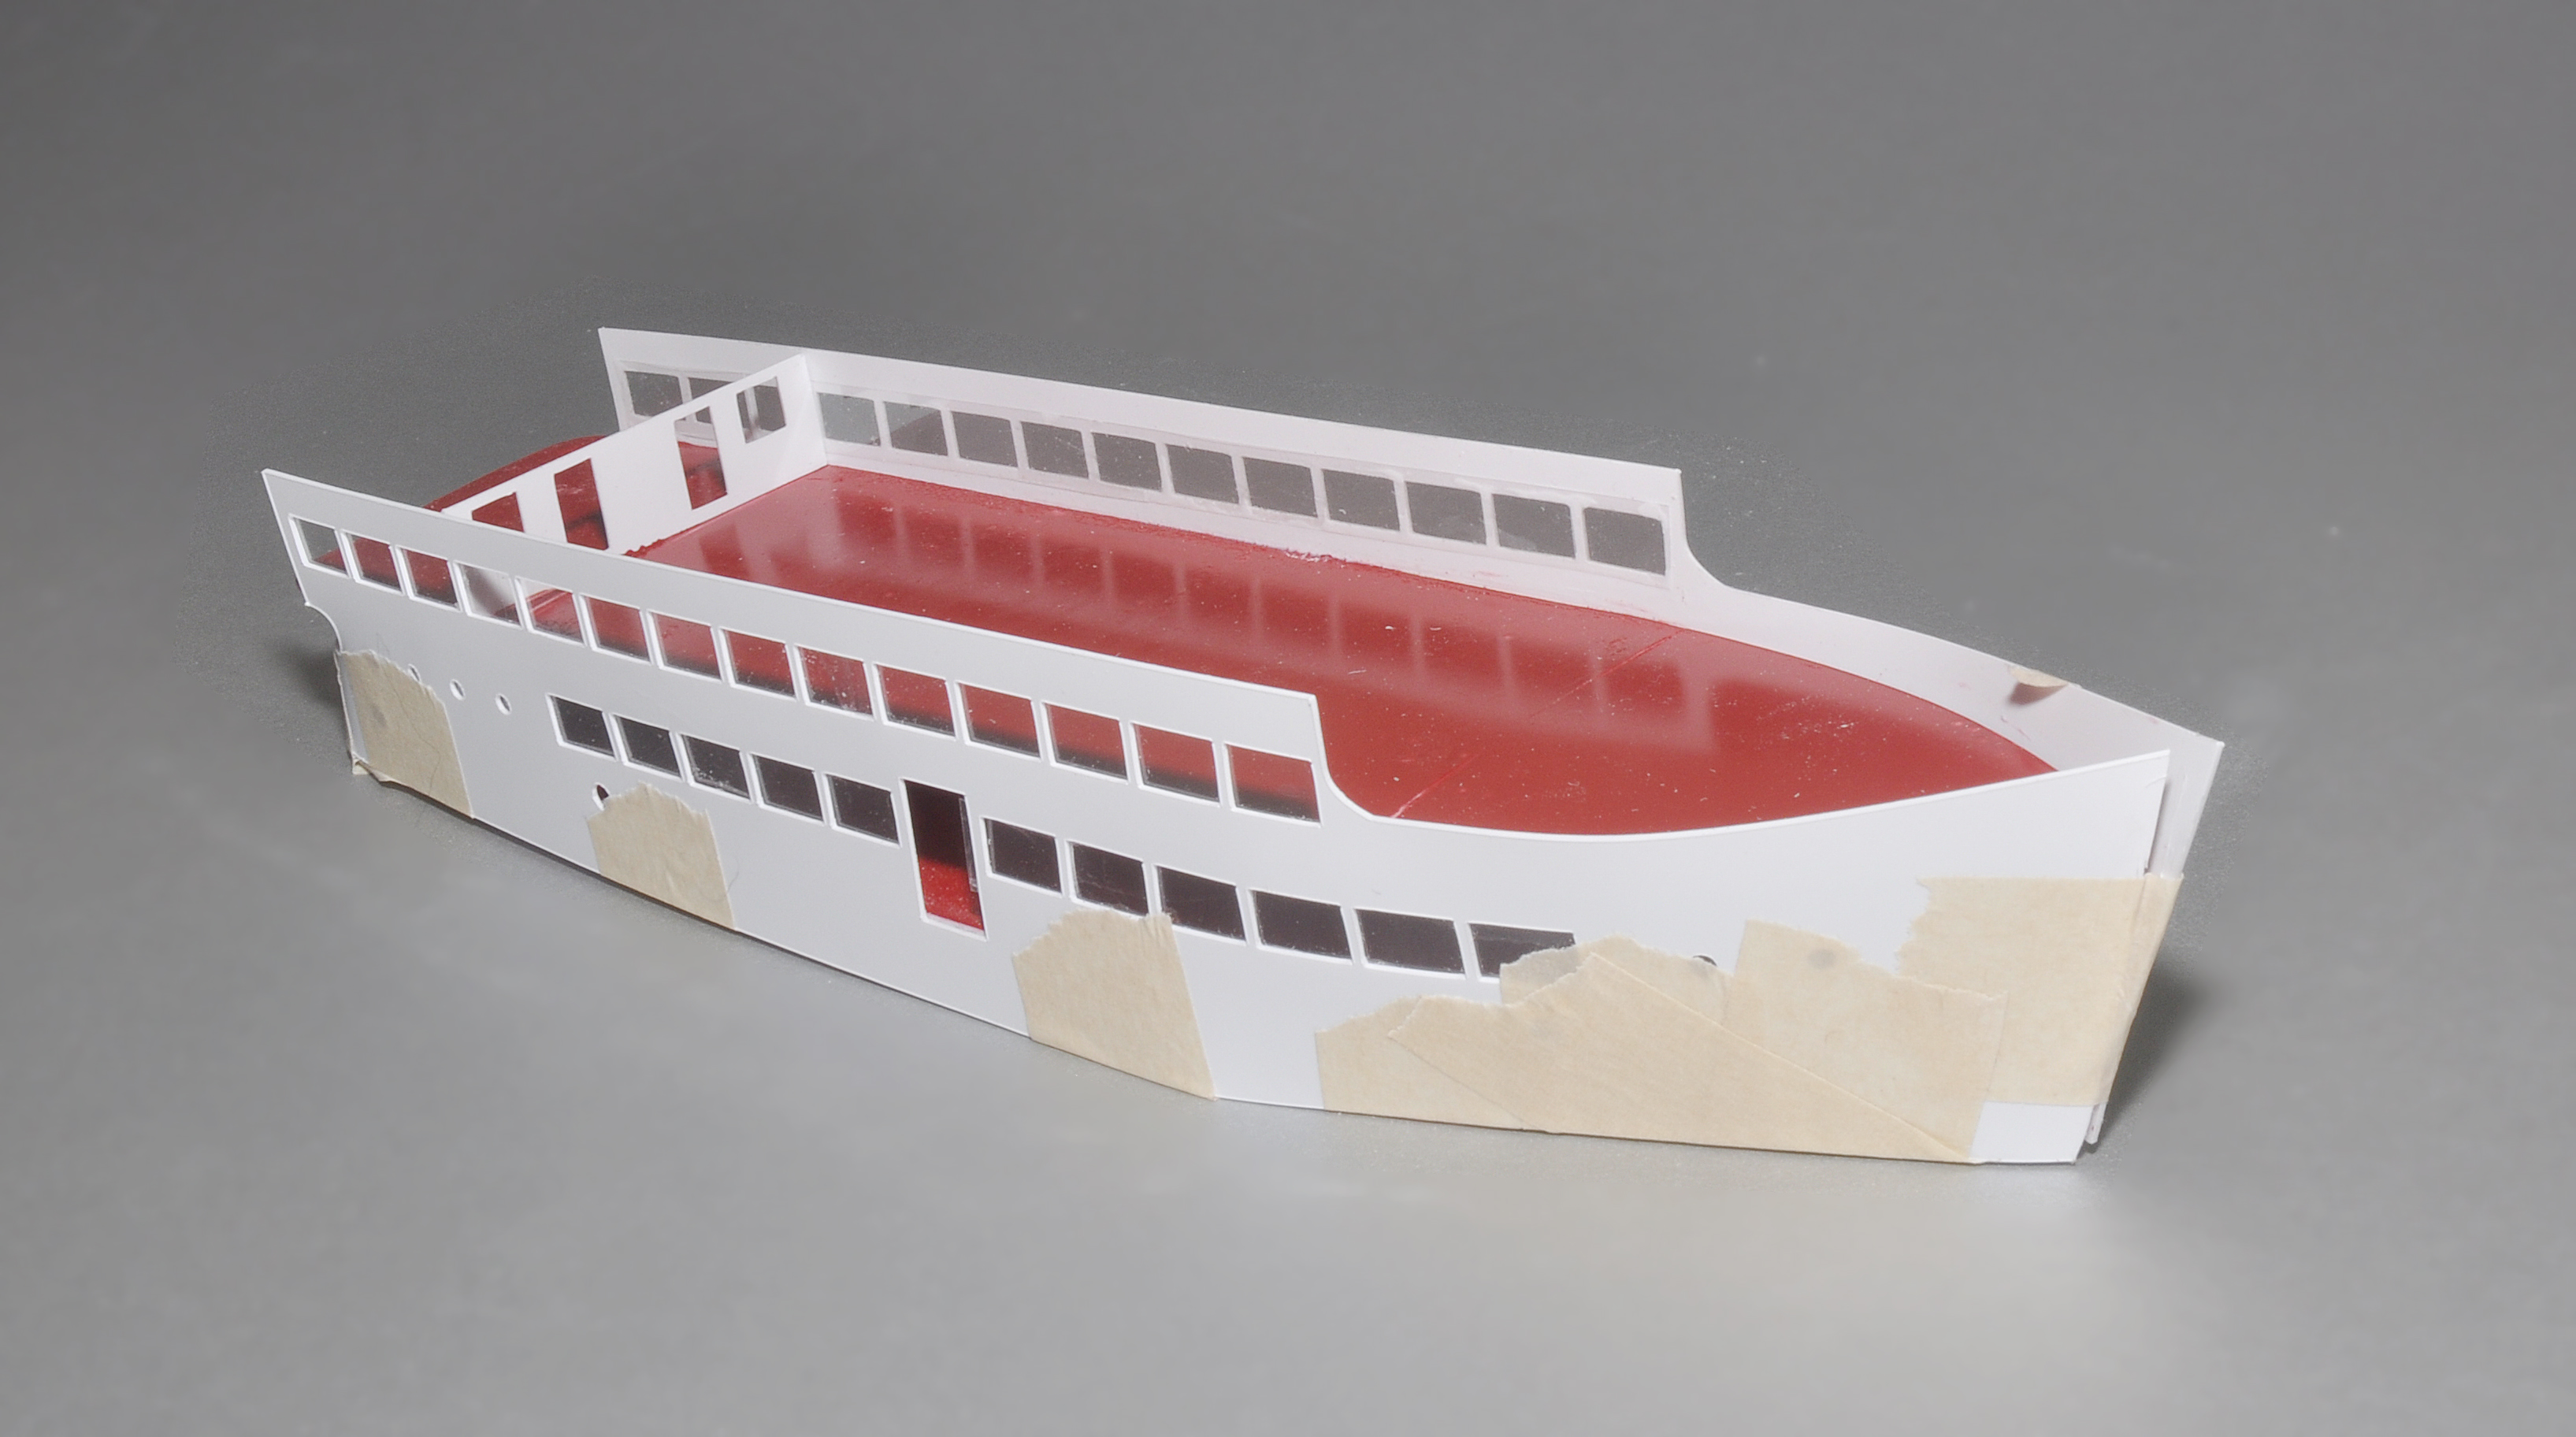
At this time, bend the “tail” of the hull side around the curve. There may be a gap at the bottom, which is not important.
Glue the front and rear bulkheads to the 01 deck and hull sides as shown (front bulkhead not shown). At this stage, check for hull creep, and make sure the top of the bulkheads is 1 mm below the top of the hull sides.
Laminate the 02 (top) deck. 
 Glue the 02 deck to the bulkheads and top of the hull sides, maintaining alignment. The 02 deck should be flush at the top with the hull sides. Use plenty of masking tape to keep the sides attached to the decks, especially at the bow.
Glue the facing strips (1 front, two rear), aligning the tops with the decks, but making sure they are parallel. Cut the strips a little longer than needed and trim once they are firmly attached to the main length. If the decks have tilted at the rear, the facing strips can be used to conceal the tilt.
Curve the tail of the second side around the bend at the stern. Using a sharp knife, slice it along the line of the first tail, so that there is no overlap. Try to keep the two tails aligned. They will be covered (and reinforced) by the small rectangle from the hull package. Like the facing strips, this rectangle can be used to square things up at the stern. Coax the facing strips around the curves and trim at the hull sides. Use tape to keep them curved until glue has dried.
The hull is nearly finished. Cut lengths of square or half round strips (only square strips in Z) for most of the length of the hull. Align them with the bottom of the lowest three circular openings on the hull sides and glue as shown. (The image at right shows the pilot house and other details already mounted—I don’t always follow my own instructions.)
02 Level Pilot House
Many parts are of similar size, so do not remove them from bags until needed.

The floor and roof of the 02 Pilot House and Captain’s Lounge are joined by a short tab to help you identify them. Cut through the tab, and mark and put aside the lounge parts.
Place the floor on a flat surface. All parts except the roof contact the surface (you are gluing the edges of the floor to the insides of the wall, not the bottom edge of the wall to the top of the floor).
Glue the pilot house back to the floor.
Cut an 10 (N) or 8 (Z) mm wide strip from the long side of the acetate, then cut it slightly longer than the pilot house front. Knock the chads out of the windows, and use masking tape until it is curved roughly the same as the floor. Holding the acetate to a similar curve, glue it to the front. (If you glue the two pieces when flat, the acetate will buckle when curved.) When dry, trim the acetate so that it is just past the edge of the rearmost windows. This is necessary so that the acetate does not add to the width of the pilot house.
Aligning at the back, glue one edge of the front to the back and floor, add the roof, and let strengthen.
Wrap the front around the floor and roof and glue. Trim any excess length from the front. Notice the slight overhang along the rear edge. Cut or sand it off.
Glue the sunshade (with dotted line, and the top cap to the roof. Note that the top cap protrudes slightly at the rear. Use it as a rear drip cap or cut it off. If desired, cut three narrow wedges in the sunshade to bend it down. These will require some filling and sanding.
Consider tracing the sunshade of stiff cardstock and using that instead.
Glue the narrow doors in place.
02 Level Heads and Lounge (6 parts)
Note: Consider building this upside down, starting with the roof instead of the floor.
Glue one end (with door outwards) to the floor. Glue the two sides, clipping the end, making sure the square window is aft.
The doors may be loose from shipping vibrations. I use acetate strips to cover the windows, and also to re-secure the doors.
Glue the roof to the three sides. It is perfectly acceptable to have a small ridge around the roof, and that will aid in securing railings.
The fourth (inner) end is optional.

Stack
The stack mounts directly behind the lounge.
Back Stairwell
The floor is identified by a scribed or marked dot.
Glue the sloped sides to the floor.
Glue the front and back, clipping the edges of the sides
Glue the roof on top of the assembly.
Glue the doors.
Life Rafts and Davits
Remove cut-outs. Glue one base to one cut-out top (8) for life rafts.
(Note: the life rafts will mount on the topside railing, starting at the first vertical window divider aft)
The base of the davits is the same shape as the taller base+boom. Make four, two forward (base forward) and two aft (base aft).
(Note: the forward davits will mount, booms angled inward, at the second vertical window divider on the 01 level deck. The aft davits will mount the length of the lifeboats, at about the fifth divider.)
Lifeboats & Ready Lockers
You may need to sand the tops of the life boats, skiff and backs of the ready lockers. I mount the lifeboats directly to the top deck along their keels. If you want to build cradles out of bits of styrene, I would reduce the height of the keelstrip. The skiff mounts on the stern. Placement of the ready lockers is not critical.
Masts and jacks
The tubing or thick base of the mast is only about 6-8 scale feet high, with the remained solid wire. You may have to ream the tubing to fit the wire inside: spinning the wire in the opening usually works.
I file a small groove and glue the yardarm to the mast with superglue, at the junction of the tubing and wire. A few loops of fine thread will strengthen the joint. The top angled piece can be positioned carefully at the same joint, tacked with superglue, then bound with thread.
Life Rings
Life rings are mounted on the sides of the pilot house and rear stairway.
Stairways
Assemble the stairs. There are 13 steps on the front stairways and two vertical posts per stairway. The short stairs from the pilot house rear doors, and up to the pilot house roof are between 3 – 5 treads, and need one post and the bottom. There is enough stock to make a mistake or two.
Bend the railings up 90 degrees where the stair treads join the risers. Holding the stairway in one hand at about the right angle, use a sharp-pointed tweezers to slide between treads and snap each one into location. Don’t try bending the treads–once you got the tweezers positioned, a quick snap will bend them into a surprisingly uniform position.
Railings
The photos show where railings are mounted. I use superglue and a lot of patience.
I received the z-scale model kit and have begun assembly. I have glued the top deck to the tops of the bulkheads and the edges of the side hulls. But, I have encountered a problem. Where do I find the facing strips? Aside from the bulkheads, I have not opened any of the enclosed packages. The U-shaped pieces look like they will become the deck bench.
Al,
I see that the Z scale version did not include the facing strips. If there is excess styrene, you can cut 2 mm strips from that. Or I’ll mail you some. Sorry about the omission–and thanks for bringing it to my attention.
Peter
At the moment, I don’t see that I have any excess styrene. Please send the strips and, if you could, a little extra styrene – I may need them for the edge around the bottom of the hull. Thanks.
They will be in the mail tomorrow morning.